13 Days of Samhain: what I’ll be doing

With everything that has been going on in my personal life and the world (I hate watching the news and scrolling through Facebook), my practices have taken a big hit.

I do firmly believe just keep trying and do little things, if that is all you can muster.

So this year, I will be sharing what I’m doing to get back on track with my spiritual practice, my witchy practice, and my tarot practice.

This will be posted on instagram. I will likely come here and give some updates and trying and share a little.

A preview? Why not! I’ll be doing the following:

  • Setting up a working candle (finally!)
  • Making an anointing oil
  • Blessing some salt for magickal purposes
  • Alternatives to an ancestor altar
  • Drying some fruits for uses
  • Creating a scrying mirror
  • Making a Samhain incense
  • Creating a Witches’ Ball (never done this before)
  • Mulling cider and wine (mead specifically-delish!)
  • Some kitchen witching
  • Cauldron magick and alternatives
  • Tarot spreads for the upcoming year
  • Thoughts and ideas for Samhain

Yes, this might seem boring. This is really for me. I am willing to share. It might inspire someone to do these things. It might be the push someone needs to get back into their spiritual or witchy practice.

Do you have to follow along? No

Do you have to do all these things for Samhain? No

Do whatever you feel is right for you this Samhain season.

Much love and many blessings!

*This is starting on the 18th to give me time to be fully ready for Samhain on the 31st. 

Halloween/Samhain Crafting: Skull Candelabra

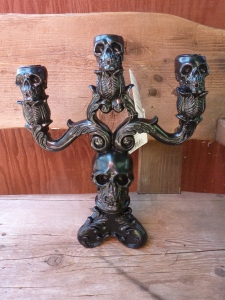
I love Halloween. I cannot get enough of the skulls and black cats and scary movies. So I was super excited back in September when I walked into my CVS pharmacy and saw all the decorations. There was one in particular that caught my eye-a skull candelabra.

One of the candelabras before I had my way with it.

One of the candelabras before I had my way with it.


I had to have one. And then I started to think of how unique I could make it look. After completing my fun project, I got an idea for another. I was excited to find they had gotten more in around the end of September.  I got another one.

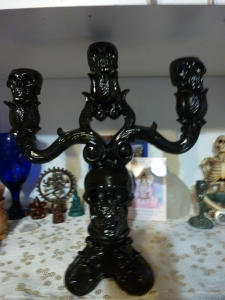
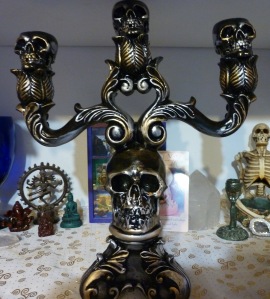
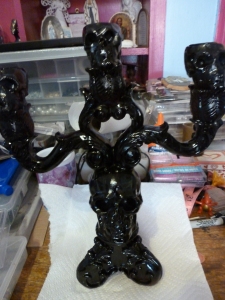
They are just black plastic. Nothing fancy, but they have some nice detail. I took the first one I got and painted it with gloss black spray paint. Then I took Rub n’ Buff in gold leaf and in silver leaf and got a little carried away. I wanted to really accent the detail in the leaves, flowers, and especially the skulls! When all was done, I hit it with a clear coat.

After a single coat of black spray paint.

After a single coat of black spray paint.

After some Rub n Buff!

After some Rub n Buff!


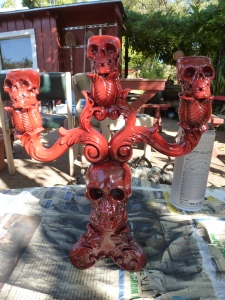
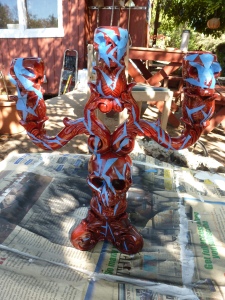
The second one was a bit more difficult. With this one, I wanted it to look like something was breaking out of it and causing it to bleed!

Here with the Fiesta Red Krylon spray paint

Here with the Fiesta Red Krylon spray paint

I wanted a crackled effect. I spray painted it blood red (Fiesta Red to be exact). Then the next day, I tried some crackle spray paint in black. I learned that spray crackle paint sucks!!! It would not work. Luckily I only sprayed a small portion on the back.

My sad attempt to make "cracks" with blue painters' tape

My sad attempt to make “cracks” with blue painters’ tape

I still wanted the cracked effect. So I cut some thin strips of painters’ tape and started putting it on. Then I hit it with gloss black spray paint. With the tape still in place and after a day to let the paint dry, I used the gold leaf Rub n’ Buff and did the same thing I did with the first one. Then I removed the tape.

Here it is with black spray paint over the red

Here it is with black spray paint over the red

It kind of looked like crap! (Sorry, no pictures with the Rub n Buff or with the tape off…I forgot)

But I still had one more thing to do-add the dripping blood! To do this, I used a pour medium from Liquitex. It dries clear. When added to acrylic paint, it makes the paint more fluid.

So for the dripping blood, I used naphthol crimson and added a little ivory black to darken it. It is a bright red. Then I added the pour medium until I had the right, drippy consistency. It is important to mix it thoroughly.  Then with the non-bristle end of a paint brush, I started to add the “blood”.

Here is my bloody candelabra!

Here is my bloody candelabra!


I got a bit carried away.

I waited a few days, to let all the paint set, before applying a spray clear coat.

My brother says it looks like wax.  What do you think?  Hope you enjoyed this little bit of crafting.

-Cassandra